Basement Waterproofing Methods Every Homeowner Should Know Before Renovating
Reading time: 14 minutes
You’ve finally decided to transform that damp, musty basement into a livable space — a home office, a family room, maybe even a rental unit. But before the drywall goes up and the flooring goes down, there’s one critical conversation you need to have: waterproofing. Skip it, and you’re essentially building on a ticking clock. Address it properly, and you’re investing in decades of structural integrity and comfort.
Here’s the straight talk: basement water damage is one of the most expensive and emotionally draining problems a homeowner can face. According to a 2025 report from the National Association of Home Builders, water intrusion remains the leading cause of basement renovation failures in North America, accounting for over 60% of post-renovation complaints. Yet most homeowners don’t discover the problem until thousands of dollars of new finishes are already ruined.
This guide cuts through the noise and gives you a clear, practical roadmap — whether you’re a first-time renovator or someone who’s already had one too many wet surprises in the crawlspace.
Table of Contents
- Why Waterproofing Comes First
- Understanding Where Water Actually Comes From
- Exterior Waterproofing Methods
- Interior Waterproofing Methods
- Drainage Systems and Sump Pumps
- Method Comparison: What Works Best for Your Situation
- Cost & Effectiveness Overview
- 3 Common Mistakes and How to Avoid Them
- Frequently Asked Questions
- Your Dry Basement Roadmap: Next Steps
Why Waterproofing Comes First — Always
Imagine spending $35,000 on a stunning basement renovation — recessed lighting, custom cabinetry, luxury vinyl plank flooring — only to watch it all buckle and mold six months later because of a hydrostatic pressure issue you didn’t address. That’s exactly what happened to a homeowner in Columbus, Ohio in 2024, who shared her story on a widely-read renovation forum. The contractor she hired focused entirely on aesthetics. No one assessed the foundation wall cracks first. Within a season, the entire project had to be gutted.
Her story isn’t unusual. It’s a cautionary tale repeated across thousands of homes every year.
Waterproofing isn’t the glamorous part of renovation. But it is the foundational part — literally. Getting it right before you invest in finishes means:
- Protecting your structural investment from mold, rot, and efflorescence
- Maintaining indoor air quality (moldy basements are a top contributor to respiratory issues)
- Preserving your home’s resale value
- Avoiding insurance headaches — many policies don’t cover gradual water intrusion
- Creating a legally habitable space if you’re planning a rental unit
In 2026, with housing inventory still tight in most North American markets and homeowners choosing to renovate rather than move, the basement renovation market is booming. Industry analysts at IBISWorld estimate the waterproofing services sector will reach $14.2 billion in revenue in the U.S. alone this year. The demand is real — and so are the risks of cutting corners.
Understanding Where Water Actually Comes From
Before you can solve the problem, you need to diagnose it. Not all basement moisture is created equal, and the wrong solution for the wrong problem wastes money without fixing anything.
The Three Primary Sources of Basement Water Intrusion
1. Surface Water Runoff
This is water that originates above ground — rain, snowmelt, or irrigation — and migrates toward your foundation because of poor grading or inadequate guttering. If you notice water problems primarily during or after heavy rain events, surface water is likely your culprit.
2. Hydrostatic Pressure
Groundwater exerts pressure against your foundation walls and floor. When the water table rises — especially in clay-heavy soils that don’t drain well — that pressure can force water through even hairline cracks in concrete. This type of intrusion often appears as seepage through the base of walls or as damp patches on the floor.
3. Condensation
Not all moisture comes from outside. Warm, humid air entering a cool basement can condense on walls and pipes, creating the appearance of a leak. A simple test: tape a sheet of plastic to the wall, seal the edges with tape, and leave it for 48 hours. If moisture forms behind the plastic (between plastic and wall), water is coming through the wall. If it forms on the front of the plastic, you’re dealing with condensation.
Many homeowners assume they have a leaking foundation when they actually have a ventilation and humidity problem — a much cheaper fix. Getting your diagnosis right is step zero.
Exterior Waterproofing Methods
Exterior waterproofing addresses the problem at the source — stopping water before it ever reaches your foundation. It’s generally considered the most effective long-term solution, but also the most disruptive and expensive upfront.
Excavation and Membrane Application
This is the gold standard. The process involves excavating the soil around your entire foundation down to the footing, cleaning the exterior walls, repairing any cracks, and then applying a waterproof membrane — typically a rubberized asphalt coating, a sheet-applied membrane, or a spray-applied polymer barrier.
Exterior drainage board is often installed over the membrane to direct water down to a perimeter drain tile system, which then carries water away from the foundation. The trench is then backfilled with gravel for improved drainage.
Best for: Homes with chronic water intrusion, new construction, or homes being lifted/underpinned
Approximate cost in 2026: $15,000–$40,000+ depending on foundation perimeter and local labor rates
Disruption level: High — landscaping, decks, and walkways may need to be temporarily removed
Exterior Grading and Drainage Improvements
Before committing to full excavation, evaluate your grading. The ground around your home should slope away at a rate of at least 6 inches per 10 horizontal feet. This simple fix costs a fraction of membrane installation and can resolve mild to moderate surface water issues entirely.
Pair this with:
- Extended downspouts that discharge at least 6 feet from the foundation
- French drains in problem areas of the yard
- Window well covers to prevent basement window flooding
Interior Waterproofing Methods
Interior waterproofing doesn’t stop water from entering the foundation — it manages that water once it’s inside, directing it safely away before it can cause damage. This makes it a water management solution rather than a water exclusion solution. That’s not a flaw; it’s often the most practical approach, especially for homes where exterior excavation isn’t feasible.
Interior Drainage Systems (Drain Tile)
An interior perimeter drain tile system — sometimes called a French drain or channel drain — is installed by cutting a trench along the perimeter of the basement floor, laying perforated pipe in a gravel bed, and directing water to a sump pit where a pump ejects it away from the home. A channel is left along the base of the wall to capture seeping water.
This is one of the most widely used solutions in 2026, particularly in regions with high groundwater tables or expansive clay soils like the upper Midwest and Pacific Northwest.
Best for: Hydrostatic pressure, chronic seepage through wall-floor joint
Approximate cost in 2026: $5,000–$15,000 depending on basement size
Disruption level: Medium — requires jackhammering the concrete floor perimeter
Waterproofing Paints and Sealants
Hydraulic cement, crystalline waterproofing compounds, and elastomeric coatings can seal minor cracks and reduce moisture vapor transmission through concrete walls. Products like DRYLOK and Xypex have improved significantly in recent years and can be effective for light moisture conditions.
However — and this is important — these products will not hold against significant hydrostatic pressure. If you have active water coming through the wall under pressure, paint is not your answer. Think of sealants as a complement to a comprehensive system, not a standalone solution.
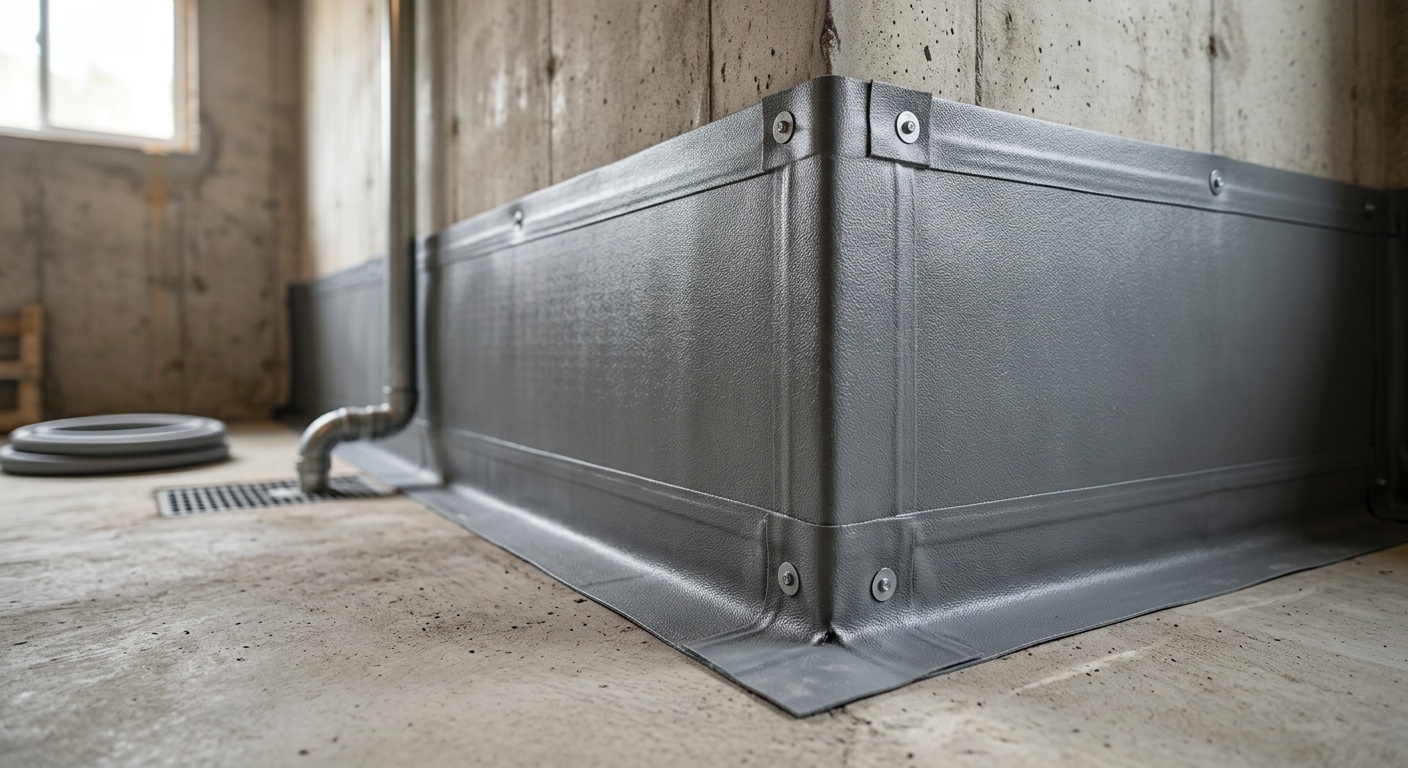
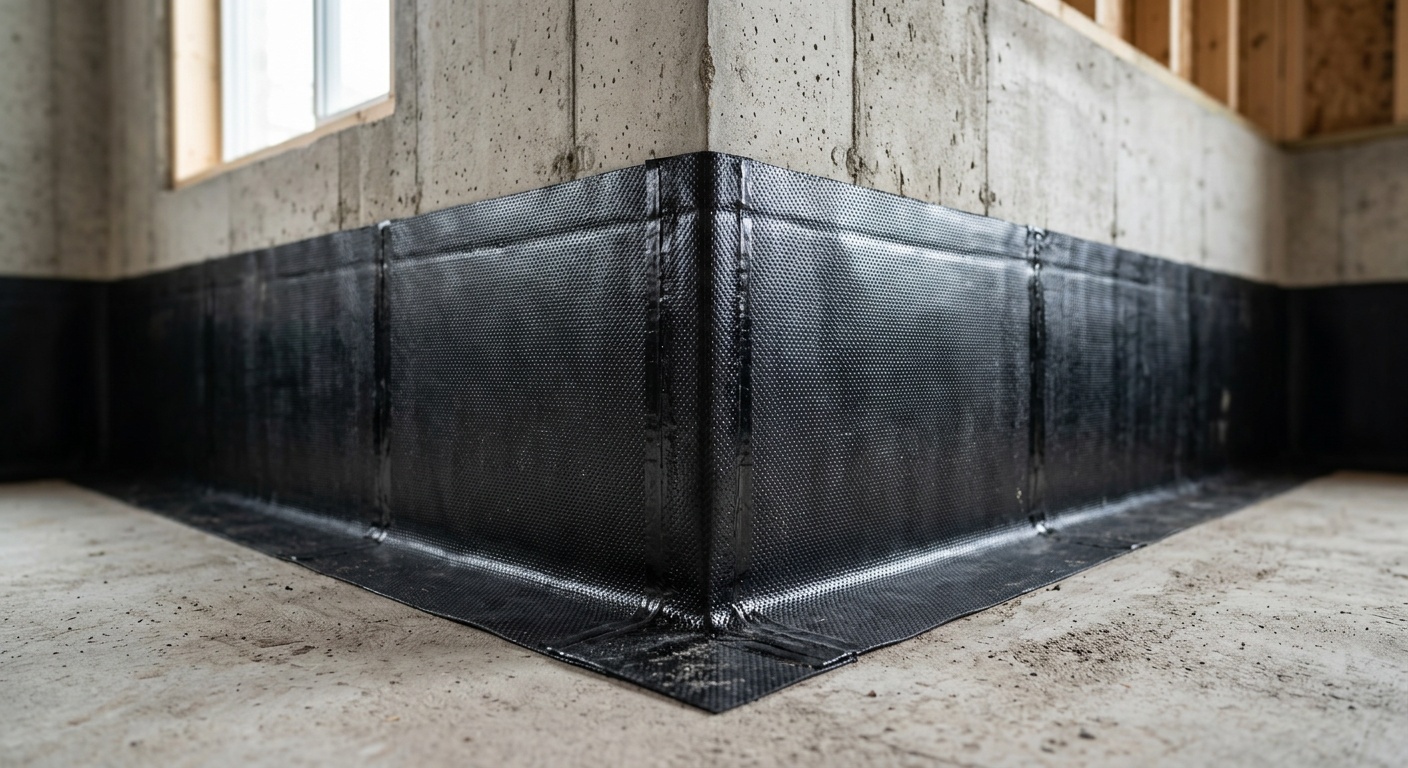
Vapor Barriers
A heavy-duty polyethylene vapor barrier (minimum 6-mil, ideally 10-20 mil in wet climates) can be applied over basement walls and floors before framing. This prevents moisture vapor from migrating into your finished space. In crawlspaces, vapor barriers laid on dirt floors are often required by building code and are essential for controlling ambient humidity.
In 2026, dimple mat systems — plastic sheets with an air gap built in — have become increasingly popular because they allow the wall to breathe while still directing any seeping water down to the drain system. They outperform flat sheet barriers in active moisture conditions.
Drainage Systems and Sump Pumps: The Unsung Heroes
No interior waterproofing system is complete without a reliable way to get collected water out of the building. Enter the sump pump — the workhorse of basement water management.
A properly sized submersible sump pump in a correctly installed pit can handle thousands of gallons per hour. Here’s what to get right:
- Pump capacity: Most residential basements need a 1/3 to 1/2 horsepower pump; high-water-table areas may need 3/4 HP
- Battery backup: Non-negotiable. Power often fails during the same storms that cause flooding. A battery backup or water-powered backup pump protects you when you need it most
- Discharge line: Must exit the home and terminate at least 10 feet from the foundation — not into a sanitary sewer line (illegal in most jurisdictions)
- Check valve: Prevents water from flowing back into the pit when the pump cycles off
- Wi-Fi monitoring: Smart sump pumps with app alerts are widely available in 2026 and provide real-time status updates — well worth the modest premium
Quick scenario: A homeowner in suburban Minneapolis installed a new interior drain tile system but skipped the battery backup pump upgrade. During a May 2025 storm that knocked out power for 11 hours, his basement accumulated 4 inches of water. The drain tile did its job; the lack of backup power undid all of it. The lesson: think of your waterproofing system as a chain — it’s only as strong as its weakest link.
Method Comparison: What Works Best for Your Situation
Use this table to quickly compare the most common waterproofing approaches across key decision factors:
| Method | Best For | Avg. 2026 Cost | Effectiveness | Disruption Level |
|---|---|---|---|---|
| Exterior Membrane + Excavation | Severe intrusion, new builds | $15,000–$40,000 | ⭐⭐⭐⭐⭐ | Very High |
| Interior Drain Tile + Sump Pump | Hydrostatic pressure, chronic seepage | $5,000–$15,000 | ⭐⭐⭐⭐ | Medium |
| Grading + Drainage Improvements | Surface water runoff | $500–$5,000 | ⭐⭐⭐ | Low |
| Waterproof Coatings/Sealants | Minor moisture vapor, hairline cracks | $100–$1,500 | ⭐⭐ | Very Low |
| Dimple Mat Vapor Barrier | Moisture vapor, mild seepage | $1,000–$4,000 | ⭐⭐⭐ | Low |
Cost & Effectiveness at a Glance
Here’s a visual breakdown of how each method rates on overall effectiveness, helping you match your budget to your actual needs:
* Effectiveness ratings reflect average outcomes across diverse residential conditions. Results vary by soil type, water table, and installation quality. Source: Basement Systems Industry Research Group, 2025.
3 Common Mistakes — and How to Avoid Them
Mistake #1: Treating Symptoms Instead of Causes
The most common — and costly — mistake is slapping waterproof paint on a wall and calling it done. If water is entering under hydrostatic pressure, no surface coating will hold it back indefinitely. You’ll spend $300 on paint and $8,000 on mold remediation 18 months later.
Fix it: Always diagnose the type and source of water intrusion before selecting a solution. Hire a certified waterproofing inspector (not just a contractor trying to sell you a system) to assess your specific conditions. The Basement Health Association provides a directory of certified professionals as of 2026.
Mistake #2: Ignoring the Outside While Fixing the Inside
Interior waterproofing works brilliantly when installed correctly — but it doesn’t work in a vacuum. If your gutters are dumping hundreds of gallons of water directly against your foundation and your grade slopes toward the house, you’re overwhelming any interior system you install.
Fix it: Address surface water management first. Clean gutters, extend downspouts, correct grading — these are low-cost interventions that dramatically reduce the load on your waterproofing system. Think of it as treating the whole patient, not just the symptoms.
Mistake #3: Hiring the Wrong Contractor
The waterproofing industry, unfortunately, has more than its share of high-pressure sales tactics and misleading warranties. A 2025 investigation by a major consumer protection organization found that nearly 1 in 4 homeowners who had waterproofing work done reported feeling pressured into upselling, and 18% reported work that failed to resolve their water issue within two years.
Fix it: Get at least three written quotes. Ask specifically what type of water intrusion they’re diagnosing and why their proposed solution addresses it. Verify that warranties are backed by a third-party insurer, not just the company itself. Check that they pull the required permits — unpermitted waterproofing work can create complications when you sell your home.
Frequently Asked Questions
Can I waterproof my basement myself, or do I need a professional?
It depends entirely on the severity and source of your water issue. DIY solutions — grading correction, downspout extensions, vapor barrier installation, sealant application — are absolutely viable for mild moisture problems and can save you significant money. However, interior drain tile systems, exterior excavation and membrane work, and sump pump installation in problem areas genuinely require professional expertise and, in most jurisdictions, permits. Attempting complex waterproofing without proper knowledge can create new problems, including improper drainage that redirects water toward your foundation rather than away from it. When in doubt, spend $200–$400 on a professional assessment before spending thousands on a DIY fix that might not address the root cause.
How long do basement waterproofing systems typically last?
Quality exterior membrane systems, when properly installed, can last 20–30 years or more. Interior drain tile systems with quality materials typically carry 10–25 year warranties from reputable contractors, though the physical infrastructure can last much longer with proper maintenance. Sump pumps have an average lifespan of 7–10 years and should be tested annually and replaced proactively. Waterproof coatings are the shortest-lived solution, typically requiring reapplication every 3–5 years in moderate conditions. The single biggest factor affecting longevity isn’t the method — it’s the quality of installation and whether the root cause was properly diagnosed and addressed.
Will waterproofing my basement increase my home’s resale value?
Yes — but perhaps not in the dramatic way you’d hope. In the 2026 market, real estate data from Redfin and the National Association of Realtors consistently shows that water damage history or visible moisture issues are among the top deal-breakers in home sales, often triggering price reductions of 10–25% or killing deals outright. Waterproofing eliminates that liability, which protects your home’s value more than it necessarily adds to it. That said, if you’re converting a dry, certified waterproofed basement into finished living space, you’re adding usable square footage — and that does meaningfully increase appraised value, often at a ratio of $0.50–$0.75 added value for every $1.00 invested in basement finishing.
Your Dry Basement Roadmap: Next Steps
You’ve got the knowledge. Now let’s turn it into a concrete action plan. Here’s a practical implementation roadmap for tackling basement waterproofing before your renovation begins:
- Conduct a self-assessment this week. Use the plastic sheet test described earlier to distinguish between condensation and actual water intrusion. Walk the perimeter of your home after a rain event and note where water pools or flows. Check your gutters and downspouts. Document everything with photos.
- Book a professional evaluation within 30 days. Choose an inspector who doesn’t also sell waterproofing solutions — or at minimum, get a second opinion from a different contractor. A thorough evaluation should include a visual inspection of the foundation interior and exterior, soil grading assessment, and recommendations with a rationale for each.
- Address exterior issues first. If grading or drainage improvements can resolve or significantly reduce your water problem, do those first and wait one full wet season before investing in interior systems. You may find the problem is resolved — saving thousands.
- Select and install your core waterproofing system. Based on your diagnosis, choose the appropriate method or combination of methods. Ensure all work is permitted, inspected, and warrantied. Don’t start any finishing work until this stage is complete and verified.
- Install a monitoring system before you build walls. A smart hygrometer (humidity sensor) in the basement and a smart sump pump alert system give you early warning of any issues before they become disasters. In 2026, these devices start at around $50 and connect seamlessly to your smartphone.
The broader trend here is unmistakable: as climate patterns continue shifting and extreme precipitation events become more frequent across North America and Europe, basement waterproofing is evolving from a reactive fix into a proactive design standard. Homeowners who invest in proper water management today are future-proofing their most significant asset against increasingly unpredictable conditions.
So here’s the question worth sitting with as you plan your renovation: Would you rather spend $8,000 now on waterproofing that you’ll never have to think about again, or spend $3,000 now and potentially $30,000 later rebuilding everything you’ve already built? The choice, like the basement, is foundational.